Writing and publishing
The editor, the two tabs, and what "published" means.
A post has exactly two states, draft and published, and one screen for editing it. That screen is split into a Writing tab, which holds nothing but the title and the body, and an Options tab, which holds everything else. The split exists so that the writing tab stays empty of settings.
The Writing tab
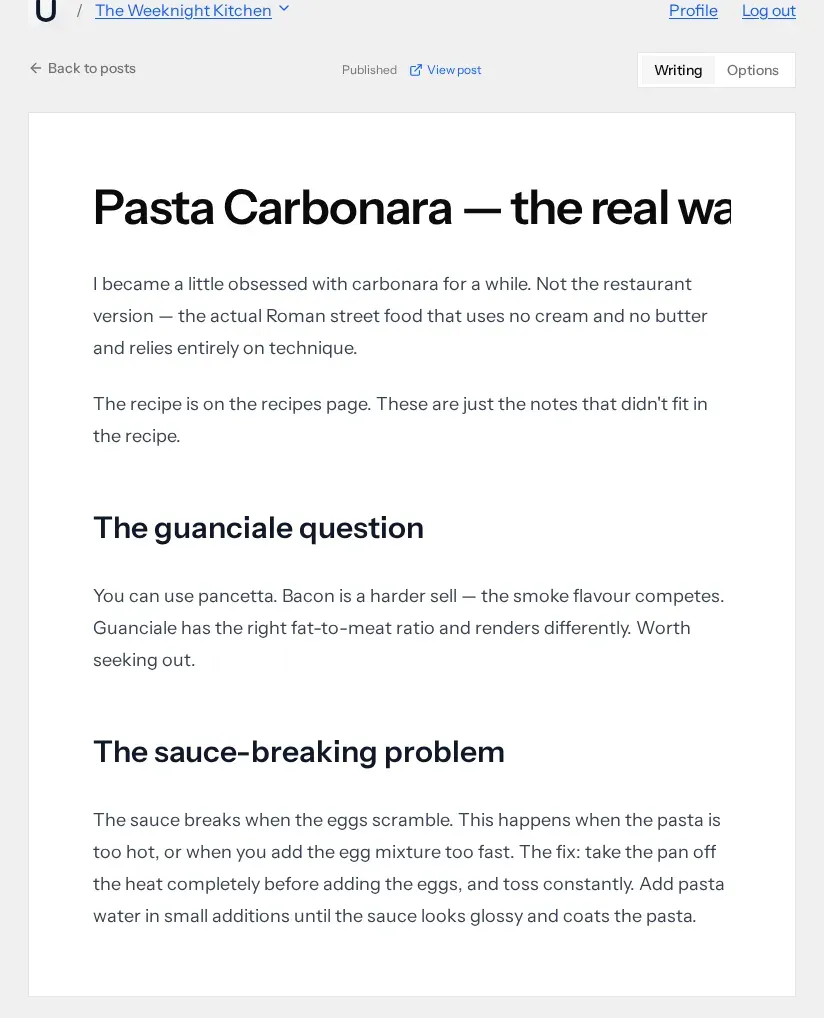
The title is the large line at the top; the body starts underneath it. There is no permanent toolbar. Select some text and a small bar appears over it with bold, italic, heading 2, heading 3, blockquote and link. Put the cursor on an empty line and a different bar appears with those same formatting controls plus insert image and insert divider. Both disappear again when you keep typing.
The header line above the card always tells you where the post stands: Draft or Published, and when it is published, a View post link that opens the live version. Back to posts returns to the list.
Markdown works, and is not required
You do not have to learn any syntax to use the editor. But if Markdown is already in your fingers, typing it does the right thing:
- ## then a space starts a heading
- - then a space starts a bulleted list
- > then a space starts a blockquote
- **bold** and *italic* convert as you close them
The conversion happens as you type, so what you end up looking at is the formatted result, not the source. There is no Markdown source view to switch to, and no plain-text mode. If you want to write in a real text editor and never open a browser, that is what the terminal client is for.
The Options tab
Everything that is about the post rather than in it lives here: the slug, tags, visibility, the excerpt, the featured image, and a collapsed Danger zone holding Delete post. Deleting cannot be undone, which is why it is behind a fold and a confirmation.
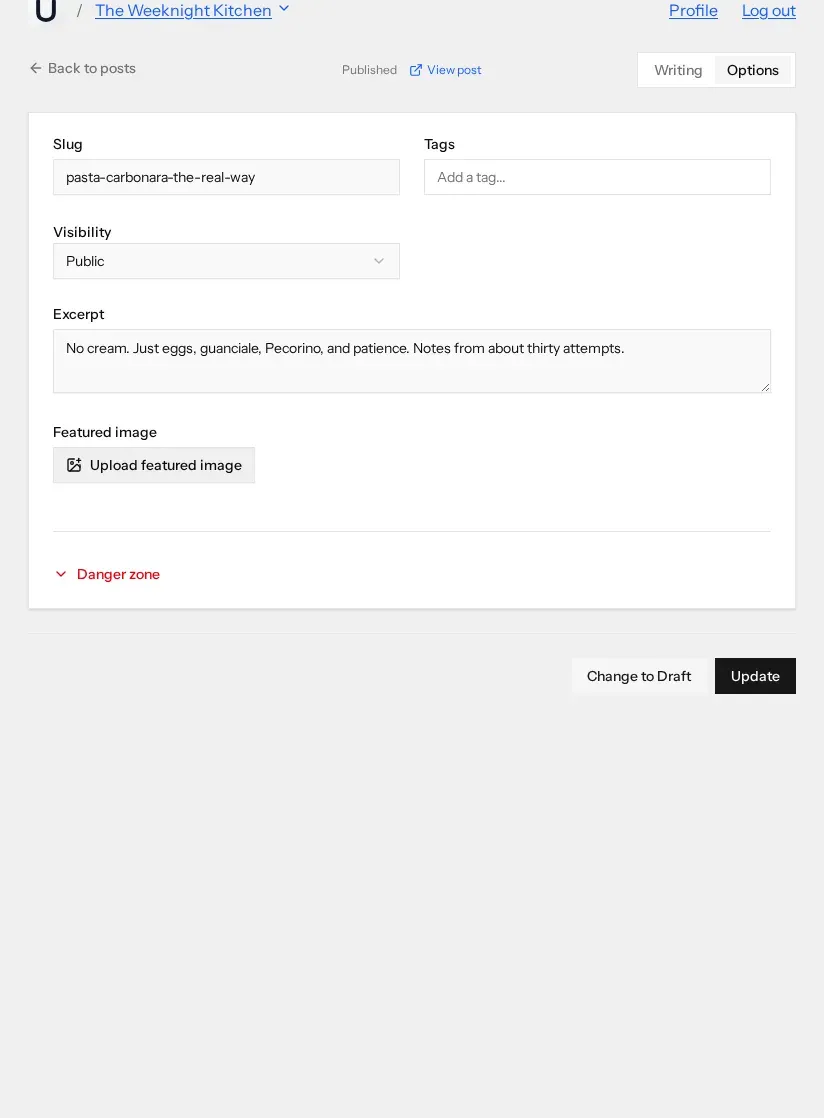
Slug
The slug is the last part of the post's URL. A new draft is created with a placeholder slug — something like untitled-b2yfcf — and it does not change when you type a title. Set it yourself in Options before you publish, or that random string is the address readers get. Lower-case letters, digits and hyphens only; it has to be unique within the blog, and it cannot collide with the slug of one of the blog's pages.
Tags
Type a tag and press Enter to add it; Backspace on an empty field removes the last one. As you type, the field suggests tags already used elsewhere on this blog, which is the main defence against ending up with recipes, Recipes and recipe. Tags become browsable pages on the blog and each one gets its own feed — see feeds and discovery.
Visibility
If the blog has private sections, a Visibility control appears here, set to Public by default, with each section listed as an alternative. It is absent on blogs that have no sections. Sections are covered in pages beyond posts.
Excerpt and featured image
The excerpt is a short summary — up to 1,000 characters — used where the whole post would be too much: listings, feeds, and link previews. Leave it blank if you would rather the post speak for itself.
The featured image is one image that represents the post. Upload it with Upload featured image and it appears as a thumbnail with a small remove button in the corner. It is separate from the images inside the body.
Images in the body
Three ways in: drag an image file onto the editor, paste one from the clipboard, or use the insert image button on the empty-line toolbar. Any of them uploads the file and drops it where the cursor is. Select several at once and they upload one after another, in the order you picked them, each appearing as it finishes.
JPEG, PNG, GIF and WebP are accepted, up to 10 MB per file. Once an image is in the body, selecting it shows a round handle at its bottom-right corner; drag that to resize it.
Drafts and published posts
A post starts as a draft. Drafts are not on the blog: not on the index, not in the feeds, not reachable by URL. Only you can see them, in the post list.
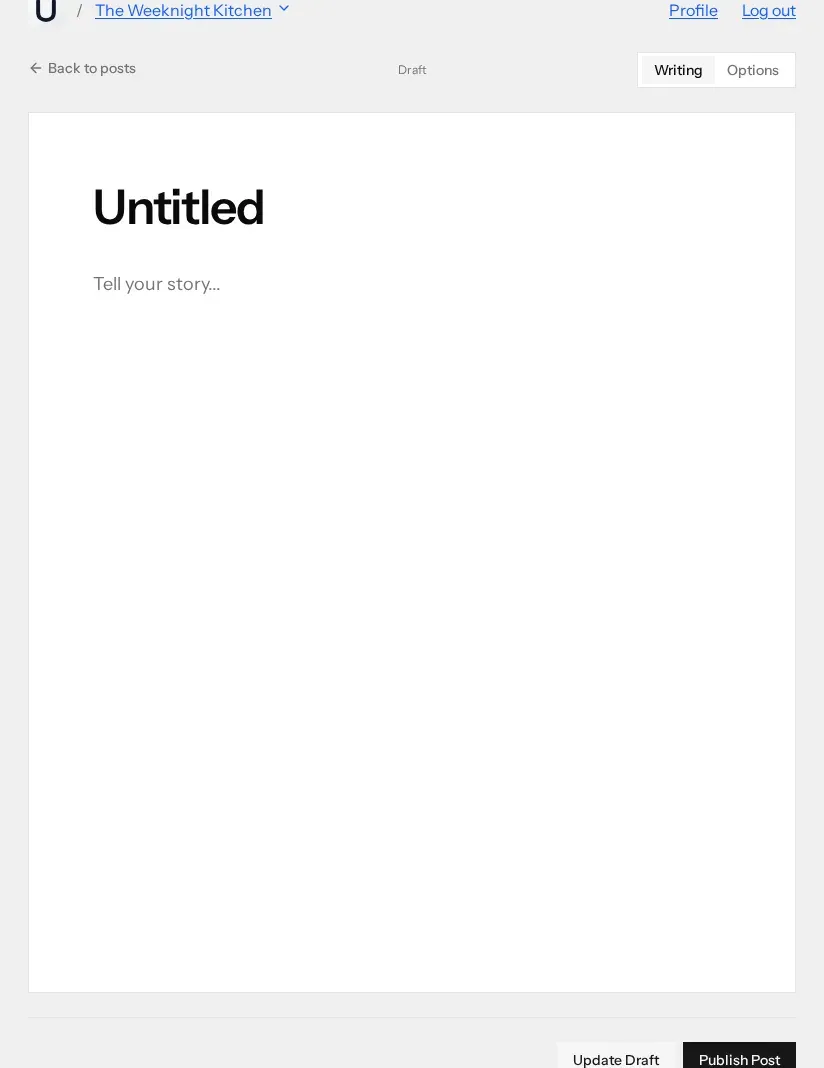
While a post is a draft, the buttons at the bottom are Update Draft and Publish Post. Publishing saves whatever is currently on screen and makes the post live in the same action, so you never lose the last paragraph by publishing before saving.
Once it is published, those two buttons become Change to Draft and Update. Update saves edits to the live post. Change to Draft takes it back off the blog without deleting anything — the post returns to your drafts, and readers get nothing at that URL. Publish it again later and it keeps its original publication date rather than jumping to the top of the blog.
Nothing is saved to the server as you type. The editor does keep a local copy in your browser, and if it finds one newer than the saved version when you reopen the post, it says so in a banner and offers to discard it. That is a safety net for a closed tab, not a substitute for pressing the button.
The post list
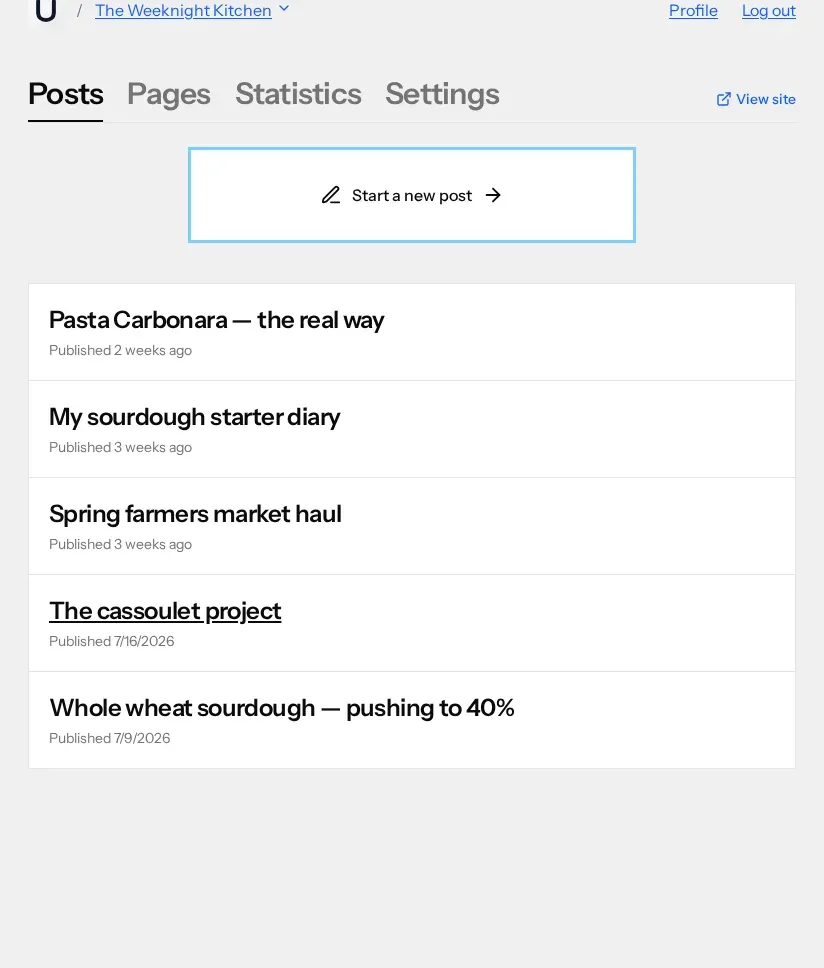
Drafts and published posts sit in one list, newest first, eight to a page. Each row gives the title and one line of status: Published with a date, or Draft with when you last touched it. Clicking a row opens it in the editor. Start a new post creates a fresh draft and takes you straight into it.
The tabs across the top are the whole blog: Posts, Pages for the things that are not dated entries, Statistics for who read what, and Settings for the theme and typography, the domain, feeds, and the rest. View site opens the public blog, which is the only view that matters in the end.
None of this is much use without something to write in. Start your blog →