Using the terminal client
Install it, sign in, and learn the keys. The complete reference.
ultrv is a single Rust binary that talks
to the same REST API as the browser. A post written in the terminal is
the same post on the web, immediately, because there is no separate
store and nothing to sync. The
terminal client overview
shows what the screens look like; this page is the reference.
Installing
On Linux and macOS the install script detects your platform — Linux on
x86_64 or ARM64, macOS on Intel or Apple Silicon — and puts the binary
in /usr/local/bin. It asks for
sudo only if that directory is not
writable by you.
curl -fsSL https://dl.ultrv.com/install.sh | shOn Windows, in PowerShell:
irm https://dl.ultrv.com/install.ps1 | iex
That unpacks ultrv.exe into your local
app data directory and adds it to your user PATH, so a new terminal
finds it.
On Arch Linux the package is
ultrv-bin in the AUR:
yay -S ultrv-binCommands
There are four, and three of them exit immediately. This is not a client where you compose flags to publish a post — the work happens inside the full-screen interface, with keys.
| Command | What it does |
|---|---|
ultrv | Open the full-screen client. This is where all the work happens. |
ultrv update | Check for a newer release and replace the installed binary in place. |
ultrv --version | Print the version and exit. -V works too. |
ultrv --help | Print the usage summary and exit. -h works too. |
Signing in
Run ultrv with no arguments and the
first screen is a three-item menu: Login with email,
Login with API key, Create an account.
Arrow keys move, Enter chooses, Esc quits.
The email form takes your address and password, and adds a 2FA Code
field if you have two-factor authentication switched on. Pressing
F1 swaps between the email form and the
API-key form, so you are never stuck on the wrong one.
The API-key form has two fields, API Key and
Server. Server is already filled in with
https://app.ultrv.com and you can leave
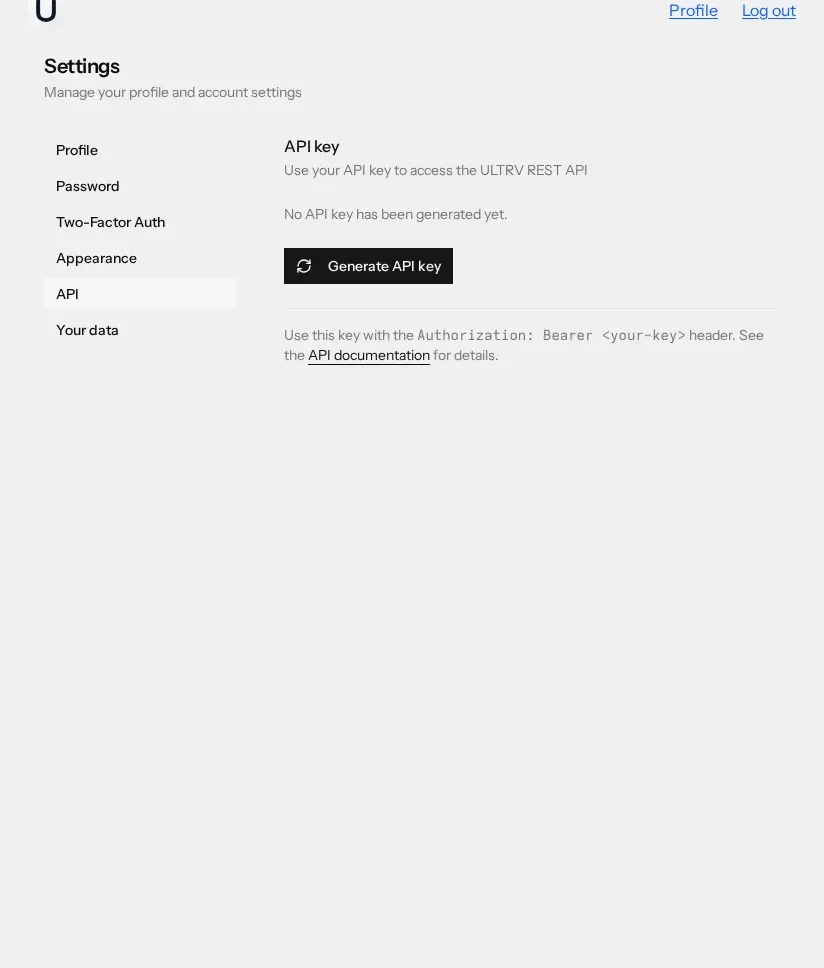
it alone. The key comes from Settings → API in
the browser, where Generate API key produces the same
bearer token the
REST API
uses.
The third option creates an account without a browser: name, email, password, and a confirmation. The password rule is printed on the screen — at least eight characters with an upper case letter, a lower case letter, a number and a symbol.
Whichever route you take, the token and the server URL are written to
config.toml in your user config
directory — ~/.config/ultrv/config.toml
on Linux. Delete that file to sign out.
The main screen
After sign-in you land on the post list for your first blog. Three tabs run across the top: 1 Posts, 2 Tags, 3 Stats.
Posts is a table of title, status, date and views, with a marker on the row your cursor is on and paging when there is more than one page. Tags lists every tag with its slug. Stats shows total views, unique visitors and your top post as cards, then a views-over-time chart and a ranked list of posts, over the last 1, 7, 30 or 90 days.
Keys on the list screens
1 2 3- Jump to Posts, Tags, or Stats
Tab- Move to the next section
↑ ↓- Move the cursor through the list
Enter- Open the selected post in the editor
F2- Start a new post
F3- Edit the selected post. On Stats, cycle the period instead
F4- Open the blog picker
F5- Reload the current section from the server
F6- Publish or unpublish the selected post, after a y / n confirmation
F8- Delete the selected post, after a y / n confirmation
F9- Create a new blog
← →- Previous and next page of posts
q or Esc- Quit
Deleting and publishing both stop for a confirmation dialog first —
y to go ahead, n
or Esc to back out.
The editor
The browser editor stores rich text. The terminal editor works in Markdown, and the client converts in both directions: HTML to Markdown when it loads a post, Markdown to HTML when it saves. That is why the two editors can share a post without either of them owning it. If you work mostly in the browser, the writing and publishing guide covers that side.
The header shows the post title, or New Post with a reminder
to press F1, plus whether it is
published or a draft. The footer carries the cursor position and a
modified marker while you have unsaved work.
Editor actions
F1- Open the metadata panel: title, slug, excerpt, tags
F2- Save
F5- Reload this post from the server, discarding unsaved changes
F6- Publish or unpublish, after a y / n confirmation
Ctrl+F- Search the text. Enter for the next match, Shift+Tab for the previous
F12- Show the shortcut overlay
F10 or Esc- Close the editor and go back to the list
Editing text
Arrow keys, Home, End, Page Up and Page Down behave as you expect. The
rest is Emacs-flavoured, and the same list is available in the client
itself under F12.
Ctrl+U- Undo
Ctrl+R- Redo
Ctrl+K- Delete to end of line
Ctrl+Y- Paste the deleted text back
Ctrl+A- Go to start of line
Ctrl+E- Go to end of line
Alt+F- Move forward one word
Alt+B- Move back one word
Working across blogs
The blog you are looking at is named in the top right of the header.
F4 opens a Select Blog
dialog listing every blog on your account; arrow to one and press
Enter, and the posts, tags and statistics all reload for it.
F9 opens New Blog.
Type a name, and the slug is derived from it — lowercased, spaces
turned into hyphens. Enter creates the blog and switches to it;
Esc cancels. Everything else about the
blog, including its domain and theme, is configured in the browser.
Staying current
The client checks for a newer release in the background on start-up
and, if there is one, shows the version in the footer.
ultrv update downloads it and replaces
the binary you are running. If you installed from the AUR, update
through your AUR helper instead so the package database stays honest.
Anything the client cannot do — themes, domains, page types, imports, the export ZIP — lives in the browser. Start with getting started if the account side is new to you, or export and backup if you want your writing on your own disk as well.